How to Add and Embed Videos in Google Slides: A Complete Guide

Create videos in Movavi Video Suite:

  • Create complete movies with music and effects
  • Convert and play back media files
  • Burn CDs, DVDs, and Blu-ray discs

By clicking the download button, you're downloading a trial version of the program.*

Edited by Ben Jacklin
18,361

Why people want to add videos in Google Slides

In today's digital landscape, incorporating videos in Google Slides has become essential for creating impactful presentations across business, education, and marketing sectors. Adding multimedia content to your presentations transforms ordinary slides into dynamic narratives that capture attention. Whether you're conducting employee training, delivering classroom instruction, or pitching to clients, videos provide a richer experience that improves comprehension and knowledge retention. The interactive nature of video content makes complex concepts more digestible and memorable.

Google Slides, as one of the versatile Google products, offers multiple ways to incorporate video content. Users can embed videos directly from YouTube, upload files from Google Drive, add videos from their computers (via Drive), or even insert hyperlinks to external video sources. Each method serves different purposes depending on your needs and the type of Google Slides presentation you're creating.

How to insert a video into Google Slides: Step-by-step guide

Method 1: Adding a YouTube video to Google Slides

Adding videos from YouTube is one of the most common ways to enhance your presentations. There are two primary approaches to insert YouTube videos into your slides, and both are straightforward once you know the steps.

Using the YouTube search function

  1. Open your Google Slides presentation and navigate to the slide where you want to add the video.

  2. Click on the Insert tab in the top menu bar.

  3. Select Video from the drop-down menu.

  4. A dialog box will appear with the Search tab selected by default.

  5. Type keywords related to your desired video in the search bar.

  6. Browse through the search results and click on the video title that matches your needs.

  7. Click Select to insert the video into your slide.

This method is particularly useful when you know what content you need but don't have a specific video in mind yet.

Using a direct YouTube URL

If you already have a specific video selected:

  1. Open YouTube in another browser tab and find your desired video.

  2. Copy the YouTube URL from the address bar.

  3. Return to your Google Slides presentation.

  4. Click Insert > Video.

  5. Select the By URL tab in the dialog box.

  6. Paste the copied YouTube URL into the field.

  7. Click Select to embed the video in your slide.

Customizing video playback settings

After adding your video, you can customize video playback options:

  1. Click on the embedded video to select it.

  2. Click Format options from the toolbar (or right-click and select Format options).

  3. In the sidebar that appears, expand the Video playback section. Here you can:

    -Set specific start and end times

    -Enable Autoplay when presenting

    -Select Mute audio if needed

These customization options give you precise control over how to embed video in Google Slides for the most professional presentation experience.

Method 2: Uploading a video from Google Drive

If you have your own custom videos or recordings, you can leverage your Google Drive account to store and embed these files directly into your presentation. Unlike YouTube videos, this method gives you greater control over your content and access permissions.

First, you'll need to upload your video file to Google Drive:

  1. Navigate to drive.google.com and sign in with your account.
  2. Click the New button in the top-left corner.
  3. Select File upload from the dropdown menu.
  4. Browse your computer to locate and select your video.
  5. Wait for the upload to complete (larger videos may take several minutes).

Once your video is safely stored in your Drive, you can embed it into your presentation:

  1. Open your Google Slides presentation.
  2. Select the slide where you want to add the video.
  3. Click Insert in the top menu.
  4. Choose Video from the dropdown options.
  5. In the dialog box that appears, select the Google Drive tab.
  6. Browse through your files or use the search function to find your video.
  7. Select your video and click Insert.

Pay special attention to sharing permissions when using Drive videos in presentations you plan to distribute. If others can't access your Drive files, they won't be able to view the video in Google Slides during your presentation. To ensure seamless playback for all viewers:

  1. Right-click on your video file in Google Drive.
  2. Select Share from the menu.
  3. Choose appropriate access settings: Anyone with the link works best for wider distribution.
  4. Set the permission level (Viewer is sufficient for most cases).

Using Google Drive as your video repository not only gives you more control over your media but also allows you to insert video content that might exceed typical platform limits or contain proprietary information that shouldn't be publicly available on YouTube.

Method 3: Inserting a local video from your computer

Unlike some presentation software, Google Slides doesn't allow you to directly add a video from your computer into your slides. Instead, you'll need to use a two-step process that involves Google Drive as an intermediary.

Here's how to seamlessly insert videos from your local storage. First, upload your video file from your computer to Google Drive:

  1. Open Google Drive in your browser.

  2. Click the New button and select File upload.

  3. Navigate to your video's location and select it.

  4. Wait for the upload to complete (larger files will take longer).

Once uploaded, return to your Google Slides presentation:

  1. Click on the slide where you want the video to appear.

  2. Select Insert from the top menu.

  3. Choose the Video option from the dropdown.

  4. Select the Google Drive tab in the dialog box.

  5. Find and select your recently uploaded video.

  6. Click Select to add it to your slide.

For optimal compatibility and video playback quality, Google Slides works best with these formats:

  • MP4 (most widely supported)

  • WebM (excellent quality with smaller file sizes)

  • MOV (for content created on Apple devices)

Keep in mind that videos with extremely high resolution or large file sizes may affect presentation performance. For best results, consider compressing your video or optimizing format options before uploading to Drive. This ensures smooth playback when presenting, especially if you'll be working with limited internet bandwidth.

This method gives you the flexibility to use custom videos that aren't available on YouTube while maintaining the seamless integration features of Google Slides.

Method 4: Using hyperlinks to insert videos

Sometimes embedding videos directly into your slides isn't ideal – perhaps you're concerned about presentation file size, working with limited internet connectivity, or want to access videos that can't be embedded. In these situations, creating a video link offers a practical alternative.

To create a clickable video link in Google Slides:

  1. First, obtain the shareable link for your video from YouTube, Vimeo, or other platforms.

  2. In your presentation, select the text or image you want to make clickable.

  3. Click the Insert tab at the top of your screen.

  4. From the drop down menu, select Link (or use Ctrl+K as a shortcut).

  5. Paste your video URL in the link field and click Apply.

This method transforms ordinary text or images into interactive elements that open videos in a new browser tab when clicked during your presentation. While this approach doesn't offer the seamless integrated experience of embedded videos, it provides greater flexibility for accessing content from various sources without increasing your file size or requiring continuous internet access during editing.

How to customize videos in Google Slides for better engagement

Once you've added videos to your presentation, customizing their appearance and behavior can dramatically improve audience engagement. Google Slides offers several options to fine-tune how your videos look and play during presentations.

Resizing, positioning, and aligning the video

After a video is embedded directly in your slide, you'll likely need to adjust its size and position for optimal visual impact:

To resize the video:

  1. Click on the video to select it.

  2. Drag any of the corner handles to change its dimensions.

  3. Hold Shift while dragging to maintain the aspect ratio.

For precise sizing control:

  1. Select the video.

  2. Click Format options in the toolbar (or right-click and select Format options).

  3. In the sidebar panel, click Size & Position.

  4. Enter specific values for width and height.

  5. Check Lock aspect ratio to preserve video proportions.

To position the video perfectly:

  1. Use the Position tab in Format options.

  2. Choose between positioning relative to the top-left corner or the center.

  3. Enter precise X and Y coordinates for exact placement.

  4. Alternatively, use arrow keys for small adjustments or drag the video manually.

For more complex layouts, you can use the alignment tools in the toolbar to align your video with other elements or center it on the slide. This ensures your video integrates seamlessly with text and other visual elements, creating a cohesive presentation that maintains visual harmony while highlighting your video playback when needed.

Adjusting playback options and autoplay settings

Control exactly how and when your videos play with Google Slides' customizable playback options:

To make a video play automatically during your presentation:

  1. Click on the video to select it.

  2. Open Format options from the toolbar.

  3. Click the drop down arrow next to Video playback.

  4. Check the box labeled Enable autoplay or Autoplay when presenting.

To set specific start and end times:

  1. In the same Video playback menu, enter your desired start time in the Start at field.

  2. Enter your desired end time in the End at field.

  3. This trimming feature lets you show only the most relevant portions without editing the original video.

Additional playback settings:

  • Mute audio: perfect for presentations where you'll narrate over the video.

  • Play on click: the video starts only when clicked during the presentation.

  • Loop: bideo will repeat continuously until you advance to the next slide.

These customization options give you precise control over how videos behave in your presentations, allowing you to create seamless transitions between your spoken content and video elements without awkward pauses or manual interventions.

Adding captions and enhancing accessibility

Making your presentations inclusive for all audience members is crucial, particularly when incorporating videos in Google Slides. While Google Slides support for native captioning is somewhat limited, there are several effective approaches to enhance accessibility.

Currently, Google Slides doesn't offer built-in tools to add captions directly to videos within the platform. However, you can implement these practical workarounds:

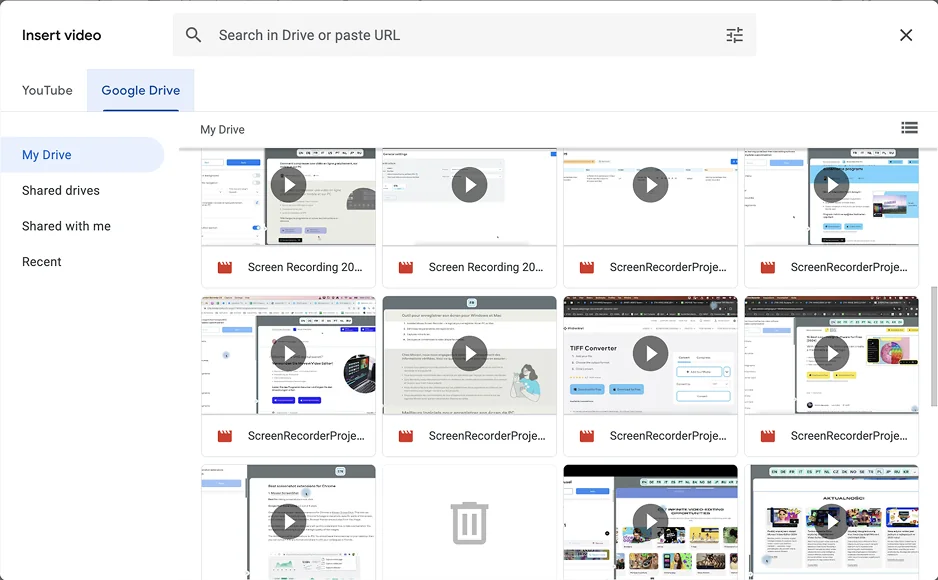
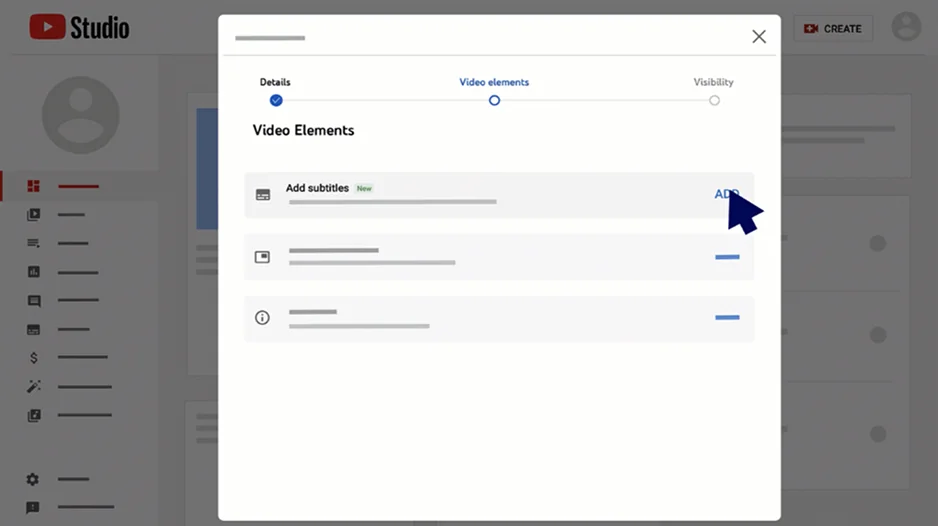
Use pre-captioned YouTube videos:

  • Upload your video to YouTube

  • Add captions through YouTube Studio's subtitle editor

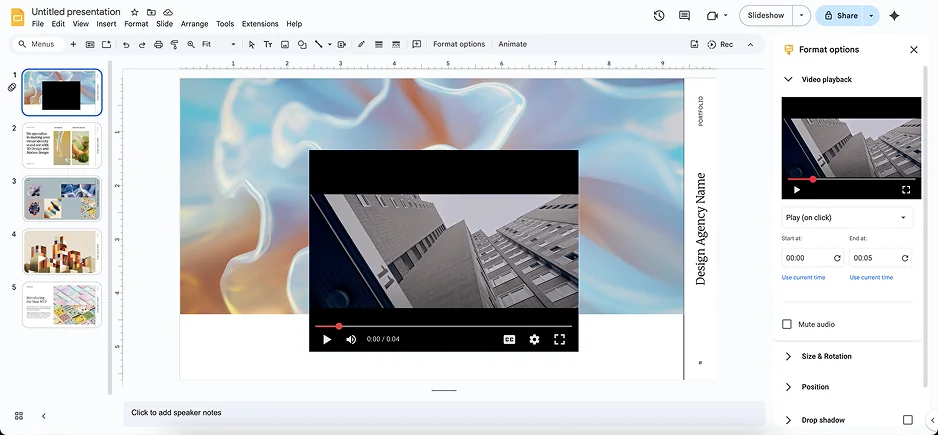
  • When embedding in Google Slides, viewers can enable captions during playback

Provide text alternatives:

  • Add text boxes below or beside videos summarizing key points

  • Create a dedicated slide with transcript highlights following video content

  • Include speaker notes with video transcripts for reference

Consider accessibility during video creation:

  • Choose videos with high contrast and clear visuals

  • Select content with good audio quality and clear speech

  • Avoid videos that rely solely on color to convey information

Beyond captions, incorporate other accessibility enhancements to make your presentations more inclusive:

  • Use alt text descriptions for images and interactive elements

  • Maintain sufficient color contrast throughout your slides

  • Structure content with clear headings and logical reading order

  • Provide downloadable transcripts as related resources

While Google's accessibility features continue to evolve, these practices ensure your presentations remain accessible to audience members with diverse needs, including those with hearing impairments, visual disabilities, or language barriers.

Use cases: When to use different video embedding methods

While knowing how to add videos to your presentations is important, understanding which method to use in different scenarios is equally crucial. Each approach to incorporating a video into Google Slides has distinct advantages depending on your specific needs.

YouTube Videos: Public educational and marketing content

YouTube integration is ideal when:

  • You're creating public-facing presentations for wide distribution

  • Your content aligns with material that's already publicly available

  • You need reliable hosting with minimal setup

  • Bandwidth concerns make streaming preferable to downloading

  • You want to leverage YouTube's robust analytics to track viewer engagement

When working with educational institutions or marketing campaigns, YouTube videos often provide the best balance of accessibility and performance. They load efficiently and play seamlessly once you click select on your chosen content.

Google Drive uploads: Internal company use and training

Google Drive is the preferred solution when:

  • You're sharing proprietary or sensitive information

  • You need granular control over who can access your videos

  • You're working with own videos that shouldn't be publicly available

  • Your organization already uses Google Workspace for document management

  • You require version control and the ability to update videos without changing links

For corporate training, internal presentations, or confidential projects, Drive's permission settings make it the most secure way to insert video content while maintaining professional quality.

Direct uploads: Offline access

Direct uploads work best when:

  • Your presentation will be delivered in locations with unreliable Internet

  • You need guaranteed playback regardless of connectivity

  • File size limitations aren't a concern

  • You want to eliminate the risk of buffering during critical presentations

  • You're creating a self-contained presentation package

Remember that while Google Slides itself doesn't support direct file embedding, you can achieve similar results by uploading to Drive first and then configuring for offline access.

Hyperlinked videos: Interactive presentations

Hyperlinked approach is most effective when:

  • You want to create truly interactive, non-linear presentations

  • Your Google Slides video content is supplementary rather than central

  • You prefer keeping presentation file sizes small

  • You want viewers to have the option to watch videos later

  • You need to reference videos on platforms beyond YouTube and Drive

Comparison: Choosing the right method

Method

Best For

Pros

Cons

YouTube

Public content, marketing

Easy to embed, reliable playback, analytics

Must be publicly accessible

Google Drive

Internal training, proprietary content

Privacy controls, integration with Google Workspace

Requires Drive access, potential permission issues

Direct Upload (via Drive)

Offline presentations

Works without internet, reliable

Increases file size, limited format support

Hyperlinks

Interactive, multi-platform content

Keeps presentations lightweight, works with any video source

Disrupts presentation flow, requires internet

Selecting the right method ensures your google slides video content enhances rather than detracts from your presentation's effectiveness. By matching your embedding approach to your specific use case, you'll create more engaging, professional, and reliable presentations.

Troubleshooting common video issues in Google Slides

Even with careful preparation, video integration in presentations can sometimes encounter technical hiccups. This troubleshooting guide will help you identify and resolve the most common issues that might prevent your videos from playing smoothly.

Why isn't my video playing in Google Slides?

When your embedded video refuses to play, several factors could be responsible:

Internet connection problems:

  • Check your network connectivity – videos require stable internet to stream

  • Try connecting to a different network if available

  • Temporarily download your presentation and video for offline use if you'll be presenting in an area with unreliable connectivity

  • Consider reducing video quality if bandwidth is limited

File compatibility issues:

  • Ensure your video file is in a supported format (MP4, WebM)

  • Large or high-resolution videos may struggle to load properly

  • Consider re-encoding your video in a more compatible format

  • Compress videos larger than 100MB for better performance

Permission restrictions:

  • If using the Google Drive tab, verify sharing permissions

  • Ensure your Google Drive link is set to Anyone with the link can view

  • For organization accounts, check if your administrator has restricted external content

  • Try downloading and re-uploading the video to a personal Drive account

Browser-related issues:

  • Update your browser to the latest version

  • Clear browser cache and cookies

  • Try using Chrome, which typically has the best compatibility with Google services

  • Disable browser extensions that might interfere with video playback

Before your presentation, always perform a test run in presentation mode to catch and resolve these issues preemptively.

Google Slides video autoplay not working?

When you want videos to play automatically but they remain static during your presentation, follow these steps:

Check your autoplay settings:

  1. Select the video in your slide.

  2. Click Format options in the top menu (or right-click and select Format options).

  3. Open the Video playback section by clicking the dropdown arrow.

  4. Ensure the Enable autoplay or Autoplay when presenting box is checked.

Verify timing settings:

  • In the same Format options panel, check that your start time is set correctly

  • If video starts at a timestamp other than 0:00, confirm this is intentional

  • Ensure the end time isn't accidentally set to the same as the start time

Test browser autoplay permissions:

  • Some browsers block autoplay by default

  • In Chrome, click the lock/info icon in the address bar

  • Select Site settings and ensure autoplay is allowed

  • Try presenting in a different browser if settings appear correct

Presentation mode considerations:

  • Remember that autoplay only functions in actual presentation mode

  • Videos won't autoplay in edit mode or presenter view

  • Use Shift+F5 or Present button to properly test autoplay functionality

When configured correctly, your videos should begin playing as soon as you advance to their slide during your presentation.

YouTube video is blocked: What to do?

Encountering blocked content due to school or corporate firewalls is frustrating but can often be circumvented:

Alternative hosting options:

  • Download the YouTube video (if permitted by copyright)
  • Upload to your Google Drive instead
  • Embed from Drive rather than using the original YouTube URL

Request temporary access:

  • Contact your IT department to temporarily whitelist specific educational content
  • Provide justification for why the Google Slides video content is necessary
  • Ask about scheduled maintenance windows when restrictions might be relaxed

Create a backup plan:

  • Prepare alternative content that conveys similar information
  • Capture key screenshots from the video to use as static images
  • Create a hyperlinked video link that recipients can access later from unrestricted networks

Consider offline alternatives:

  • Download and store relevant videos locally before arriving at restricted locations
  • Create screencasts of the videos for offline playback
  • Provide a transcript or summary if video viewing is impossible

When working in environments with strict content filtering, always prepare backup material that doesn't rely on external video content to ensure your presentation remains effective regardless of technical limitations.

Movavi Video Suite

Everything you need to create and edit multimedia files

*The trial version of Movavi Video Suite has the following restrictions: 7-day trial period, watermark on exported clips, 60-second video or 1/2 audio length limit, and/or some advanced features unavailable when exporting videos.

Movavi Video Suite

Frequently asked questions

Still have questions about working with videos in your presentations? Here are straightforward answers to the most frequently asked questions about video integration in Google Slides.

How do I embed video in Google Slides?

Adding videos to your Google Slides presentation varies slightly depending on the source:

For YouTube videos:

  1. Open your presentation and navigate to the desired slide.
  2. Click Insert video from the Insert menu.
  3. Choose YouTube in the dialog box.
  4. Either search for a video using the search bar or paste a YouTube URL.
  5. Select your video and click Insert.

For Google Drive videos:

  1. Upload your video to Google Drive first.
  2. In your presentation, click Insert > Video.
  3. Select the Google Drive tab.
  4. Find your video and click Select.

For videos from your computer:

  1. First upload your video to Google Drive.
  2. Then follow the Google Drive video steps above.

Remember that embedding videos directly keeps your presentation more professional and interactive than simply linking to external content.

How do you put a video in Google Slides from your camera roll?

Adding videos from your mobile device involves a few extra steps since the Google Slides mobile app doesn't directly support video insertion:

For Android users:

  1. Open the Google Drive app on your mobile device.
  2. Tap the + button and select Upload.
  3. Navigate to your camera roll and select the video file.
  4. Wait for the upload to complete.
  5. Open Google Slides in a web browser (not the app).
  6. Follow the standard steps to insert videos from Google Drive.

For iOS users:

  1. Open the Google Drive app.
  2. Tap the + icon and select Upload.
  3. Choose Photos and Videos.
  4. Select your video and tap Upload.
  5. Once uploaded to your Google Drive account, open Google Slides in a browser.
  6. Insert the video using the Google Drive option.

While the mobile app doesn't support direct video insertion, this workaround ensures you can still incorporate videos captured on your mobile devices into your presentations.

How do I embed a YouTube video in Google Slides at a certain time?

To make a YouTube video start playing at a specific timestamp:

  1. Insert the video using the standard method.
  2. Click on the video to select it.
  3. Click Format options in the toolbar.
  4. Under Video playback, click the drop down arrow if the menu isn't expanded.
  5. In the Start at field, enter your desired start time in minutes format.
  6. Optionally, set an end time to show only a specific clip.
  7. Check Autoplay when presenting if you want the video to play automatically.

This technique is particularly useful for lengthy videos when you only want to highlight a specific section during your presentation, saving time and keeping your audience engaged with only the most relevant content.

Have questions?

Have questions?

If you can’t find the answer to your question, please feel free to contact our Support Team.

Join us for discounts, editing tips, and content ideas

1.5M+ users already subscribed to our newsletter

By signing up, I agree to receive marketing emails from Movavi and agree to Movavi's Privacy Policy.