How to Use Green Screen on iMovie: Step-by-Step Guideline

Use Movavi Video Editor for editing clips with the green screen effect!

  • Trim, cut, crop, and rotate videos
  • Add titles, stickers, and transitions
  • Apply visual effects

By clicking the download button, you're downloading a trial version of the program.*

Edited by Ben Jacklin
8,049

Introduction: Unlocking creative video editing in iMovie

Overview and key takeaways

Ever wondered about the secret behind much of today’s movie magic? The answer lies in the green screen. Or blue screen, depending on your preference. But we’ll get to that.

The green screen revolutionized filmmaking. By recording a subject in front of a plain green background, editors could isolate that subject and drop them on a background of their choice. In space, say. Another city. An alien planet, even. The sky isn’t even the limit, it’s your imagination.

And editing ability. Fortunately, learning how to use a green screen on iMovie is fairly straightforward. We’ll cover the steps, from pre-production to final touches. By the end of this article, you’ll be a green screen on iMovie pro. 

Being able to make a green screen effect in iMovie will take your filmmaking to the next level, just like it did for directors around the world when it was first introduced. So what are you waiting for?

Who should read this guide?

If you’re thinking green screens are for professional directors, think again. This seemingly complex special effect has all kinds of uses for all kinds of creators.

Content creators, for example, might find the humble green screen useful. You could transform your small studio into a high-tech space by filming in front of a green screen and swapping the background in iMovie.

For aspiring filmmakers, the green screen technique is absolutely essential. It frees you from having to always find the perfect location. 

In short, all kinds of iMovie users can benefit from learning how to use green screen in iMovie.

Pre-production: Preparing for green screen filming

Equipment, lighting, and setup tips

The most common mistake people make when trying to achieve a green screen effect in iMovie is not preparing properly. By taking some time to plan, you’ll not only save time, but end up with a higher quality end result.

Why? Well, the trick behind a green screen effect is separating the green (or blue) background from the subject of your shot. For that to work, your subject has to stand out from the green screen background. 

You can probably already see some potential mistakes. Green clothing, for example, will be removed along with the green screen. You might have seen viral clips of people wearing green morph suits who appear to be floating heads after the green screen effect is added.

There are other areas where errors can sneak in. If your lighting is dark or inconsistent, iMovie may struggle to distinguish your subject from the background. The same goes for your camera. A low-quality lens will take in less visual information, making it harder for iMovie to achieve a clean green screen effect.

Planning your shots

Avoiding errors is just one reason to plan before filming. The other thing to consider is the precise shots you’ll be taking.

After all, you need to ensure your subject will look natural when added to whatever background you’ve chosen. For example, let’s say you want to film yourself looking around a foreign city. Consider what your shot will look like. Will you see your entire body? If that’s the case, you need to make sure your whole body is visible when filming in front of the green screen. Will you be facing the camera or away from it? Is the shot of this foreign city taken from above or at street level?

In short, you want to mimic the position of the camera that took the shot which you will be adding your subject to. When it comes to actually making the green screen on iMovie, everything should then fit together naturally.

Movavi Video Editor

Create awesome videos easily

*The free version of Movavi Video Editor may have the following restrictions depending on the build: watermark on exported clips, 60-second video or 1/2 audio length limit, and/or some advanced features unavailable when exporting videos.

Movavi Video Editor

Getting started with iMovie for green screen editing

Setting up your iMovie project

iMovie is usually installed on Mac devices. If it’s not on yours, go to the App Store and download it. It’s free!

Once you’ve installed iMovie, launch it and create a new project. Before you start wondering how to use green screen on iMovie, take a moment to organize all of your media files.

Importing media and arranging the timeline

First, you want to import everything you’ll need for this project. Remember, you should have two sets of videos. There are the videos you took in front of the green screen. And then there are all the background clips, which you are going to combine with the green screen clips.

You can import both types of clips by either selecting them in Finder and dragging them into your iMovie project, or using the Import function in iMovie.

For organization, it might help to have each type of clip saved in its own folder. Alternatively, you could arrange your clips in groups based on which scene they are a part of. Whatever organization method you use, make sure it’s one that helps your editing become more efficient. 

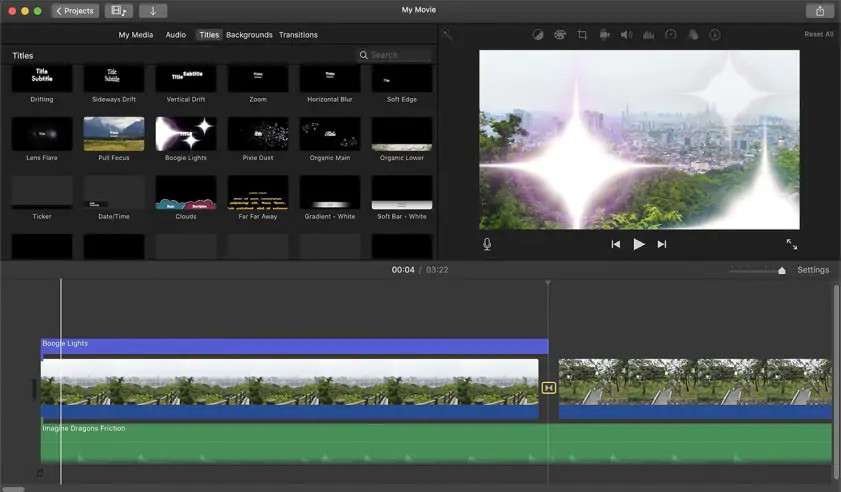
When it comes to adding your media to the timeline, take note of the fact that iMovie has multiple video and audio tracks. You may have used this feature before to help transition between different video clips. It’s key to achieving the green screen effect in iMovie.

In short, you always want to have your background clip on a video track that’s below the track containing your green screen footage. If you have multiple layers, always ensure the background video is on the lowest track.

Mastering the green screen effect in iMovie

Overview: What is the green screen effect in iMovie?

The green screen effect in iMovie is a straightforward effect with limitless possibilities. It relies on a simple premise. You remove the green background from the green screen clip, leaving the subject isolated. Then you overlay that isolated subject on another background.

The green screen effect relies on chroma key technology. That, in turn, needs a uniform background to work best. The exact color of the background is less important than the background being uniform and distinct. While green was the first color widely used, blue screens have become increasingly popular in recent decades.

Fortunately, iMovie comes with various adjustment tools that let you fine-tune the green screen effect. It’s still important to set everything up properly, but you’ll be able to use these adjustment tools to fix minor errors, like “spill.”

Spill is what filmmakers call the reflection of the green screen (or blue screen) on the subject being isolated. For example, if you film yourself in front of a green screen and see some green color on your hair, that would be spill.

Step-by-step guide: How to use green screen on iMovie

Learning how to use green screen on iMovie is straightforward. Let’s go through the steps.

  1. Download iMovie if you haven’t already.

  2. Open iMovie and create a new project. If you’ve already started a project, open that.

  3. Import your footage by dragging and dropping or using the Import window.

  4. Drag your background clip onto the timeline. Make sure it’s on one of the lower video tracks.

  5. Drag your green screen clip onto the video track above the background clip.

  6. Ensure both clips are aligned.

  7. Click on the green screen clip to select it. 

  8. You now need the video overlay controls. If they aren’t displayed, click on the Video Overlay Settings button. It looks like a rectangle overlaid over another rectangle.

  9. Clicking the Video Overlay Settings button will open a dropdown menu. Select the Green/Blue Screen option.

  10. Viola! iMovie should automatically remove the background from your green screen clip. In its place, you should see the clip on the video track underneath.

  11. Fine-tune the effect with the Clean Up adjustment tools.

  12. Once you’re satisfied, click Accept. It looks like a tick mark.

Advanced techniques and creative enhancements

Enhancing videos with custom and alternative backgrounds

The green screen effect in iMovie lets you do all sorts of things with your videos. One of the most common uses is to add custom and alternative backgrounds. 

Why do this? Well, it can give the appearance of higher production quality. You could be filming in your bedroom in front of a green screen, then place yourself in a fancy studio. Or perhaps you designed a custom background to match the topic of the video. 

Ultimately, you can put anything you want in the background. The background clip doesn’t even have to be a video. For example, you could use a stock image. Or design something in a photo editor.

Remember, you aren’t limited to just one green screen. The green screen on imovie technique can be used to add multiple subjects to a single background. And, of course, you could change the background while keeping the subject the same. Or have two different backgrounds combined!

Also remember that you don’t have to use green screen on iMovie in isolation. Try combining it with all of iMovie’s other special effects options. For example, you could combine it with a split screen effect. 

Troubleshooting and optimization tips

It’s totally normal to have to troubleshoot a little when creating a green screen effect in iMovie. Let’s go through some common issues and potential solutions.

  • Unwanted shadows: shadows can give iMovie trouble when it tries to remove the green screen background. That can leave annoying green patches in your video. The easiest fix for this is in pre production. Ensure your green (or blue) background is smooth, well-lit, and free of wrinkles to prevent any shadows appearing. Also use soft, even lighting.

  • Background not fully removed: use the video overlay settings to make adjustments. Try adjusting the softness, for example.

  • Rough edges: try repositioning the playhead before applying the green screen effect. iMovie calculates the background color to remove based on where the playhead is when the effect is applied. Alternatively, play around with the chroma key strength.

  • Clips misaligned: drag each clip in the timeline to position them. Trim each clip by dragging on either end. You can also split each clip by positioning the playhead and selecting the Split Clip option. It’s found in the Modify menu. The shortcut is Command-B.

  • Green color on clip: try iMovie’s Clean Up tool to get rid of any green patches not removed from your green screen clip.

Conclusion: Recap and next steps

Learning how to use the green screen effect in iMovie can unlock a vast range of creative possibilities and let you elevate your filmmaking. 

Green screens free you from physical location constraints, letting you superimpose yourself on the background of your choice. 

For how useful the green screen effect is, applying it is fairly straightforward. We covered using the video overlay settings to apply the effect and make tweaks, like adjusting the softness and cleaning up spill.

Now the best way for you to master this crucial effect is through practice. Try experimenting with different types of backgrounds, from still images to complex videos. In time, you’ll become a master of using a green screen on iMovie.

Movavi Video Editor

Create awesome videos easily

*The free version of Movavi Video Editor may have the following restrictions depending on the build: watermark on exported clips, 60-second video or 1/2 audio length limit, and/or some advanced features unavailable when exporting videos.

Movavi Video Editor

Frequently asked questions

How do I use green screen in iMovie?

Open iMovie and create a new project. Import your video clips. Drag your background clip onto the timeline in one of the lower video tracks. Then drag your green screen clip onto a video track above the background clip. Select the green screen clip, click the Video Overlay Settings button, then select Green/Blue Screen.

iMovie should automatically remove the background. It calculates what color to remove based on where the playhead is when you apply the effect.

You can tweak the effect by using the adjustment tools in iMovie. Also make sure both clips are aligned properly by dragging and using the trim tool.

How do I add a background to a green screen video?

Assuming you already have your green screen clip imported into your iMovie project, import a background into the same project. Drag that background, whether it’s a clip or image, onto the timeline. Ensure it’s on a lower track than the green screen clip. Also make sure both clips are aligned together.

Once that’s done, click on the green screen clip. Then click the Video Overlay Settings button and select Green/Blue Screen. iMovie should automatically remove the background from your green screen clip, allowing the background you added underneath to show through.

How do I add a background in iMovie?

Once you’ve found the background you wish to add, import it into your iMovie project. Drag it onto the timeline, ensuring it’s on one of the lower tracks.

That’s all you need to do to have a background! Next you need to add something to the background. You can do that by adding your green screen clip to the timeline, dragging it onto a track above the background clip. Ensure both clips are aligned.

Select the green screen clip. Click on the Video Overlay Settings button, then select Green/Blue Screen.

How do I remove the background in iMovie?

To remove the background from a video clip in iMovie, import your clip into iMovie and drag it onto the timeline. Click on the clip to select it, then click the Video Overlay Settings button. Select Green/Blue Screen.

iMovie will calculate the background color in the frame at which your playhead is when you clicked on that button. It will then automatically remove that color. For this effect to work, you need a background that’s a single, uniform color. The background should ideally be lit with a soft, even light, to avoid shadows. A green or blue screen is ideal.

Have questions?

Have questions?

If you can’t find the answer to your question, please feel free to contact our Support Team.

Join us for discounts, editing tips, and content ideas

1.5M+ users already subscribed to our newsletter

By signing up, I agree to receive marketing emails from Movavi and agree to Movavi's Privacy Policy.